Once your environment is provisioned you will receive connection details by email. BioShell uses SSH key authentication, you will need the key pair you generated and submitted during your access request.
If you have not yet generated and submitted your SSH key, see the SSH key generation guide first.
Connect via SSH
You connect to BioShell over SSH (Secure Shell), so you will need an SSH client on your local machine. Most operating systems now ship with one built in, and a few graphical clients are also popular on Windows. Choose whichever suits your platform:
| Platform | SSH client |
|---|---|
| macOS | The built-in Terminal app (Terminal.app) includes the ssh command. |
| Linux | Your terminal emulator with the built-in OpenSSH ssh command. |
| Windows | The built-in ssh command in Windows Terminal or PowerShell, or a graphical client such as MobaXterm, PuTTY, or an X server client. |
| Any platform | Visual Studio Code with the Remote - SSH extension, which connects and lets you edit files and run terminals inside your BioShell environment. |
ssh command is available directly from the terminal, so the command-line examples below work as-is. Graphical clients such as MobaXterm and PuTTY ask for the same details (host, username, and your private key file) through their connection dialogs instead.Add an entry to ~/.ssh/config so SSH automatically uses your BioShell key without needing
to specify it each time:
Host bioshell
    HostName <your-bioshell-ip>
    User <username>
    IdentityFile ~/.ssh/bioshell_key
Then connect with:
ssh bioshell
Or connect directly without the config entry:
ssh -i ~/.ssh/bioshell_key <username>@<your-bioshell-ip>
First login
When you connect for the first time you are greeted by the BioShell welcome message and land in your home directory:
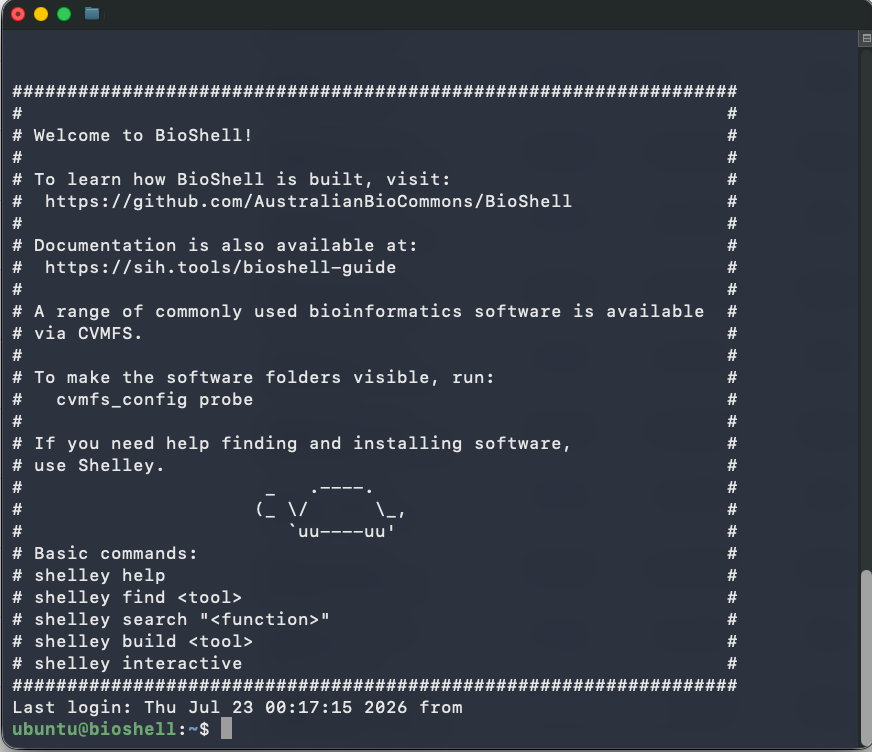
Confirm where you are with pwd:
pwd
You should see your home directory path:
/home/<username>
Once you are logged in, verify the two things you will rely on most: the software file system (CVMFS) and your storage volumes.
CVMFS access
BioShell delivers its bioinformatics tools and reference data through CVMFS, a read-only
network file system mounted at /cvmfs/. Confirm the repositories are connected by running
the probe command:
cvmfs_config probe
You should see OK for each repository:
Probing /cvmfs/data.galaxyproject.org... OK
Probing /cvmfs/singularity.galaxyproject.org... OK
You can also list the mounted repositories directly:
ls /cvmfs/
data.galaxyproject.org singularity.galaxyproject.org
| Repository | Contents |
|---|---|
singularity.galaxyproject.org |
Containerised bioinformatics tools from BioContainers |
data.galaxyproject.org |
Reference genome builds and pre-built indexes |
Failed!, wait a moment and run cvmfs_config probe again.For how to find, install, and load tools from these repositories, see the Tools and reference data page.
Storage volumes
BioShell provides two storage locations:
| Location | Volume | Purpose |
|---|---|---|
/home/<username> |
Root volume (/dev/vda2) |
Your home directory: configuration, scripts, and installed modules. |
/mnt/data |
Data volume (/dev/vdb) |
Your working data: analysis inputs and outputs. |
Use lsblk to see how the volumes are laid out:
lsblk
NAME   MAJ:MIN RM SIZE RO TYPE MOUNTPOINTS
vda    253:0    0  30G  0 disk
├─vda1 253:1    0   1M  0 part
└─vda2 253:2    0  30G  0 part /
vdb    253:16   0 100G  0 disk /mnt/data
This shows your home directory on the root volume (vda) and your data volume (vdb) as a
separate disk. Check the size and available space of your home directory with df:
df -hT /home/<username>/
Filesystem     Type  Size  Used Avail Use% Mounted on
/dev/vda2      ext4   30G   14G   15G  49% /
And your data volume:
df -hT /mnt/data
Filesystem     Type  Size  Used Avail Use% Mounted on
/dev/vdb       ext4  100G   28K   99G   1% /mnt/data
/mnt/data rather than in your home directory. The data volume is provisioned for your working data and keeps it separate from your home directory and installed software.Interactive environments
Once connected, you can also open browser-based environments directly:
| Environment | URL |
|---|---|
| JupyterLab | http://<your-bioshell-ip>:8888 |
| RStudio | http://<your-bioshell-ip>:8787 |
See the Interactive environments page for full setup instructions.